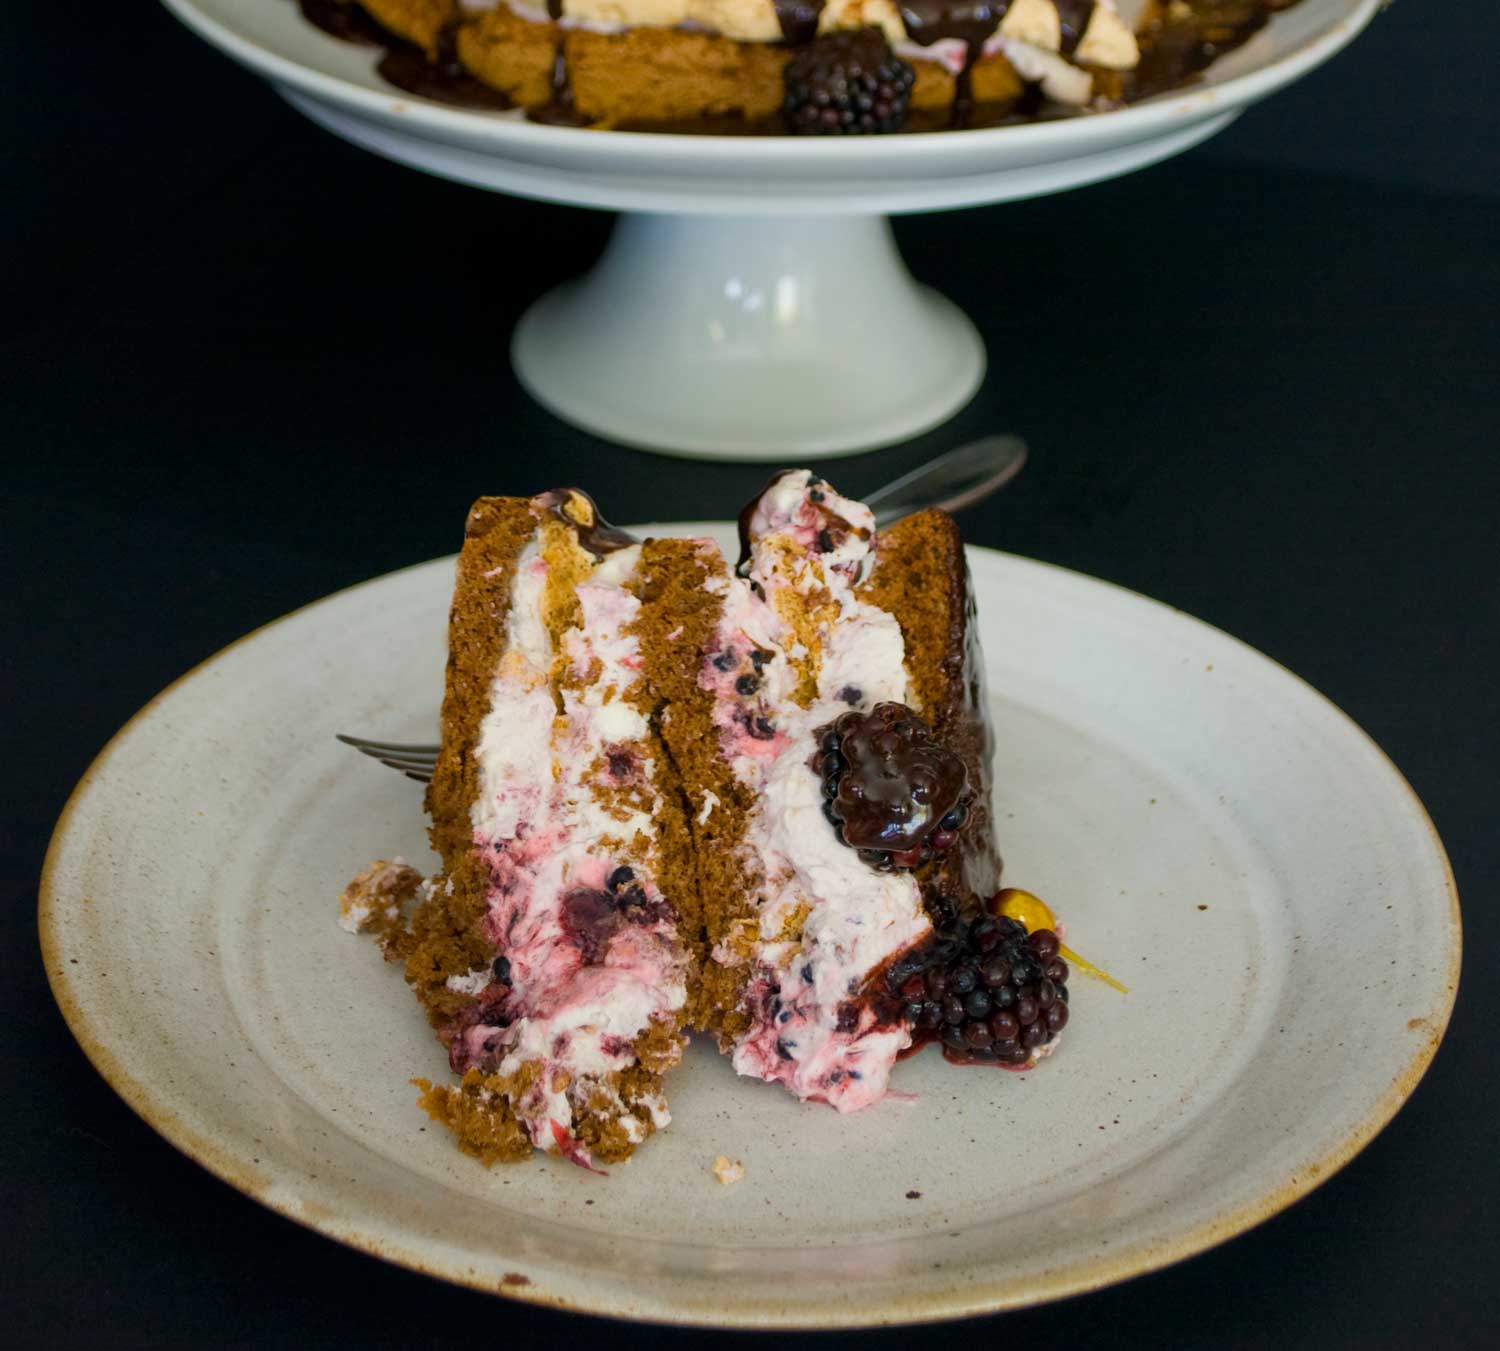
Chocolate, hazelnut & blackberry celebration cake
Sometimes all you want is a gooey, decadent, monster of a cake to share with friends and family. This chocolate, hazelnut and blackberry creation ticks all those boxes, layering sponge, meringue and cream. It’s unashamedly indulgent and incredibly messy to eat but it tastes delicious. It’s also deceptively light as there is very little flour or butter used in the recipe. Most of the bulk comes from whisked egg white which means you’ve got room to have more than once slice! Please don’t be put off by the number of steps involved, it is worth the effort. However I have provided some steps to make it easier in the hints and tips section.
Serves: 10
Difficulty: Medium
Time: 3.5 hrs
Ingredients
For the chocolate sponge
- 18cm diameter cake tin
- 3 eggs (large)
- 120g granulated sugar
- 80g self-raising flour
- 50ml semi-skimmed milk
- 30g butter
- 20g cocoa powder
For the hazelnut dacquoise
- 160g chopped toasted hazelnuts
- 100g, plus 25g caster sugar
- 15g cornflour
- 4 large egg whites
For the chocolate sauce
- 3 tbsp water
- 100g caster sugar
- 4 tbsp cocoa powder
- 1 pinch salt
- 1/2 tsp vanilla extract
- 15g butter
For the blackberry cream
- 300ml whipping cream
- 3 tbsp icing sugar
- 300g blackberries
To decorate
- 10 whole blanched hazelnuts
- 100g caster sugar
- 150g blackberries
Chocolate, hazelnut & blackberry celebration cake
Sometimes all you want is a gooey, decadent, monster of a cake to share with friends and family. This chocolate, hazelnut and blackberry creation ticks all those boxes, layering sponge, meringue and cream. It’s unashamedly indulgent and incredibly messy to eat but it tastes delicious. It’s also deceptively light as there is very little flour or butter used in the recipe. Most of the bulk comes from whisked egg white which means you’ve got room to have more than once slice! Please don’t be put off by the number of steps involved, it is worth the effort. However I have provided some steps to make it easier in the hints and tips section.
Method
For the chocolate sponge
- Set the oven to 160°C (fan).
- Line your 18cm cake tin with parchment paper; line both the sides and the bottom (see hints and tips). Note: a high sided cake tin is required for this recipe as this will encourage the cake to rise.
- Separate the eggs. Put the egg whites into a stand mixer with balloon whisk (or use a hand whisk) and set the yolks aside for later.
- Start to whisk the whites on a slow setting until you see bubbles start to form. At this point you can turn the setting up to high and continue whisking until stiff peaks form. You should be able to turn the bowl upside down without anything falling out.
- Next, start adding the sugar one spoonful at a time, keeping the whisk going at high speed throughout. Add the next spoon of sugar only after the first spoon has been completely incorporated.
- Now you can add your yolks to the meringue mix and whisk again. Once the yolks are evenly incorporated, the whisking is done.
- Pop the butter and milk in to a small saucepan and heat gently until the butter has melted. Next sift the cocoa powder in to the pan and mix well until it’s dissolved. Be sure that there are no lumps. Take off the heat and set aside.
- Next measure out your self-raising flour and sift in to egg mixture. Using a rubber spatula mix up from the bottom of the bowl using a cut-and-fold motion. It’s easier if you turn the bowl with one hand as you mix. Whatever you do don’t beat the batter or you will knock out all the air and the cake will not rise.
- Once the flour is incorporated you can add the chocolate mix to the batter. Again mix it in from the bottom up using the cut-and-fold motion until it’s fully mixed.
- Pour the batter in to the lined mould and once full drop the cake pan from a small height, about 4 -5 times, to eliminate air pockets and smooth out the surface.
- Bake for 30 minutes in your pre-heated oven. Check the cake is ready by inserting a wooden skewer in to the centre of the cake. If it comes out clean, it’s done!
- Important! As soon as it’s baked, drop the cake from a height of 20-30cm on to a work service to prevent the cake from shrinking.
- Put a moistened (and well wrung out) muslin cloth or tea towel on your work surface and gently tip the sponge cake out of the cake tin. Peel the paper off just the sides.
- Pop the cake tin back over the cake and leave for 2 -3 minutes. This is to make the top surface flat and to even out the moisture in the cake.
- Take the cake tin off after 3 minutes and gently peel off the paper from the bottom.
- Carefully turn the cake over and cool on a wire rack. Cover the cake with the muslin or tea towel and leave to cool for at least an hour.
- When the sponge cake is cool and you are ready to assemble the cake, slice horizontally in to 3 layers. You need to be very careful while doing this as the sponge is incredibly delicate. I start by scoring a line around the circumference of the cake where. Then gradually cut deeper and deeper in to the cake, spinning the board it’s on with my other hand until I’ve cut all the way through. Remove carefully with a cake slice on to another plate and repeat the process again until you have 3 layers.
- Keep the flattest layer for the top of the cake. Assembly instructions are below.
For the hazelnut dacquoise
- I tend to make the dacquoise while the sponge cake is cooling. Set the oven to 140°C (fan) and set out 2 baking trays. Cut 2 pieces of baking parchment large enough to cover the baking trays. Next draw a circle around the tin you used to cook the cake in, this will give you a template for when you pipe out the dacquoise (meringue).
- Separate the eggs. Put the whites into a stand mixer with balloon whisk (or use a hand whisk) and set the yolks aside for later.
- Start to whisk the whites on a slow setting until you see bubbles start to form. At this point you can turn the setting up to high and continue whisking until stiff peaks form.
- To the eggs, start adding 100g sugar one spoonful at a time, keeping the whisk going at high speed throughout. As before, add the next spoon of sugar only after the first spoon has been completely incorporated.
- Now prepare your hazelnuts. I buy pre-chopped and toasted hazelnuts however if you can’t get hold of these you can toast whole nuts in the oven and finely chop with a knife. Put the nuts in a small bowl and add the remaining 25g sugar and cornflour. Mix well.
- Now, gently fold in the hazelnuts. Using a rubber spatula mix up from the bottom of the bowl using a cut-and-fold motion.
- Transfer the meringue in to a large piping bag fitted with a 1.5cm plain tube. Starting in the centre of each drawn out circle, pipe a spiral of meringue on to each prepared baking tray. Place in the oven for 1 hour, swapping the baking sheets halfway through so they cook evenly.
- After one hour turn off the oven and open the door so it’s just ajar, then leave to cool for another hour.
For the chocolate sauce
- Place the water and sugar in small saucepan and stir until all the sugar has dissolved.
- Add the cocoa powder, salt and vanilla extract and stir again until well incorporated.
- Turn off the heat and add the butter, stirring once more until you have a beautifully glossy sauce. Don’t leave this to stand for too long before assembly as you want it to be at pouring consistency.
For the blackberry cream
- Whisk the cream and the icing sugar together in a large bowl until you get soft peaks. Don’t be tempted to over whisk, you want the cream to be billowing out the sides of the cake as your assemble.
- While the cream is whisking squash the blackberries with your hands. You’ll get messy but it’s very satisfying.
- Once the cream has reached the soft peak stage add the blackberries and mix together loosely. You don’t want it fully incorporated as it’s nice to get a ripple effect.
- Again don’t leave this to stand too long before assembly.
For the caramelised hazelnuts
- Pour the sugar in to a small frying pan and gently heat until the sugar has dissolved. Shake the pan occasionally to aid the caramelisation process but do not be tempted to stir.
- Once the caramel is a dark golden brown turn off the heat but leave the saucepan on the warm hob.
- Using toothpicks spear each of your hazelnuts and dip in to the caramel. You could just coat them and leave to set on a sheet of baking parchment. However if you want to create the spikes of caramel at the top, dip the nut in to the caramel letting the excess drip back in to the pan. When the dripping caramel becomes a thin string, hang the cocktail stick until the caramel fully hardens – I sellotaped the sticks to the edge of a high shelf. Trim each spike to the desired length with a pair of scissors.
- Remove the nuts very carefully from the end of the cocktail sticks once you are ready to add to your cake. They are very fragile so don’t get disheartened if they break, it takes a bit of practice to get it right.
To assemble
- Choose the cake stand you want to serve the finished cake on as there is no moving it once it’s assembled. This cake is meant to look generous, unctuous and wickedly good so don’t worry if there is cream and chocolate oozing out all over the place.
- Place your first layer of sponge on the base. Add a generous dollop of the blackberry cream and spread over the sponge. Next top the cream with one of the hazelnut dacquoise layers and add another generous helping of the cream. Repeat this process with the remaining layers; you should end up with sponge, cream, dacquoise, cream, sponge, cream, dacquoise, cream and finally sponge.
- Next pour the chocolate sauce over the top of the cake, starting in the centre and then working it out towards the edges so it drips temptingly down the side of the cake.
- Finally top with the additional 150g blackberries and your caramelised hazelnuts.
- This cake is best eaten the same day so make it when you have guests round to share it with. It’s a messy affair, to be eaten off a plate with a fork and a smile.