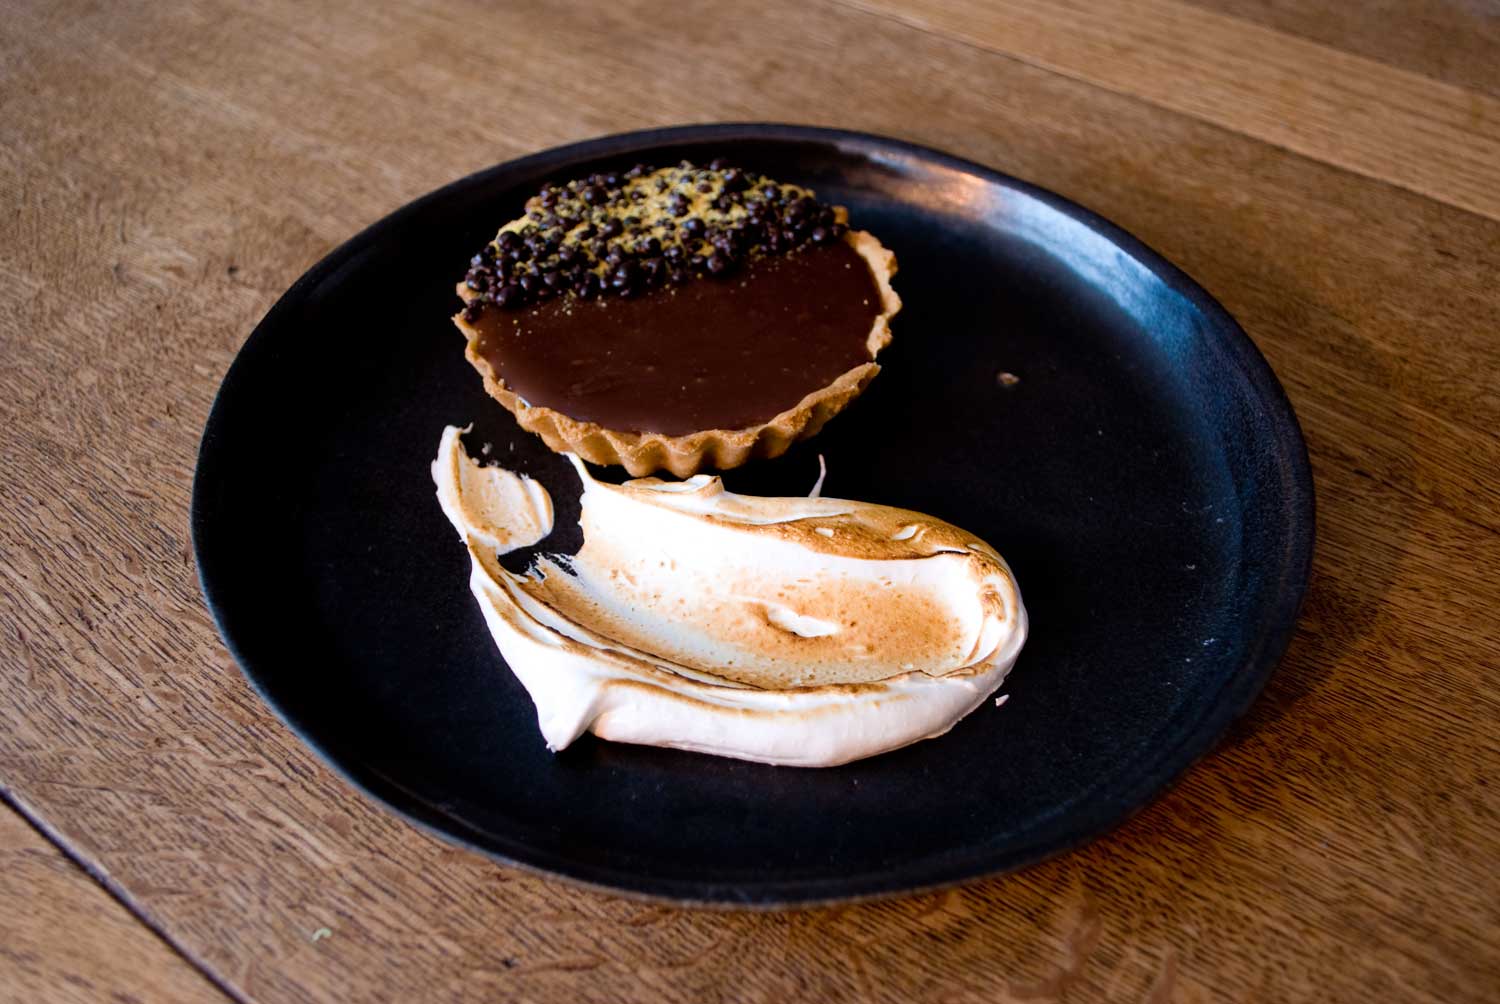
Salted caramel and milk chocolate tart with toasted marshmallow
This milk chocolate and salted caramel tart tastes ridiculously good; rich, sweet, sticky and generous, it’s everything you want from a desert and more. For this recipe I have served them as individual tarts but you could always make one giant tart and eat it all to yourself (or if you’re feeling generous you could share it with friends and family). Another bonus is that you can make it up to two days in advance, as it keeps well in the fridge. Enjoy.
Serves: Makes 6
Difficulty: Medium
Time: 40 mins (plus 1 hour chilling)
Ingredients
For the pastry
- 175g plain flour
(plus extra for dusting) - 100g cold butter
- 25g icing sugar
- 1 large egg yolk
For the chocolate filling
- 150g of 40% milk chocolate
- 150g of butter, softened
- 150g of light muscovado sugar
- 150g of double cream
- 1 tsp flaky sea salt
For the marshmallow
- 2 eggs, whites only
- 50ml water
- 90g caster sugar
- 140g golden syrup
For the decoration (optional)
- Chocolate popping candy
(see hints and tips) - Honeycomb or Crunchie bar, crushed
(see hints and tips)
Salted caramel and milk chocolate tart with toasted marshmallow
This milk chocolate and salted caramel tart tastes ridiculously good; rich, sweet, sticky and generous, it’s everything you want from a desert and more. For this recipe I have served them as individual tarts but you could always make one giant tart and eat it all to yourself (or if you’re feeling generous you could share it with friends and family). Another bonus is that you can make it up to two days in advance, as it keeps well in the fridge. Enjoy.
Method
For the Pastry
- Set the Oven to 180°C (fan)
- In a free-standing mixer with paddle attachment add the plain flour, icing sugar and the cubed cold butter then mix until it forms crumbs. If you don’t have a stand mixture you can use your hands; gently rub the dry ingredients and the butter together between your fingers and thumbs much like you would if you were making a crumble topping.
- Add 1 egg yolk and continue to mix until it forms a smooth dough. You may need to add a little bit of cold water to bring it together but do this in small amounts; you want a smooth dough not a wet one.
- Unlike most pastry you do not put this version in the fridge to rest (see hints and tips). In fact if you do it’s likely to shrink back when blind baking so for the best results use straight away.
- Grease four 10cm diameter fluted tart cases with butter and cut out 4 sheets of baking parchment which are large enough to line the pastry cases.
- Flour a work surface and roll out the pastry to approx. 2mm thick. Cut out 4 discs with a cookie cutter which is bigger than the tart cases (about 14cm) and is enough to ensure you can line the tart cases comfortably with room to spare.
- If the pastry tears whilst lining the tins just patch up any holes with the left over pastry. Make sure you don’t trim the edges as this point to allow for a little shrinkage (you can tidy up the edges once cooked).
- Prick the base of the tarts lightly with a fork and line with the prepared baking paper. I like to scrunch the paper up first in a ball and then unroll, as the creased paper sits more easily in to the round tins.
- Finally, fill the lined pastry cases with baking beads or rice and bake in the oven for 13 minutes. This is known as blind baking.
- After 13 minutes remove the tarts from the oven and gently remove the beads or rice and baking parchment. Then return the pastry cases to the oven for a further 7 mins to brown and finish cooking. While the pastry is cooking you can be getting on with making your chocolate filling (see below).
- Once the tart cases have finished cooking and have cooled take a sharp knife and gently trim the edges of the cases of any excess pastry so that you have a neat edge.
- Fill the cases with the chocolate mix almost to the top and then place in a fridge for 60 mins until set (they can be left overnight).
- Once the chocolate is set I like to cover one half of the tart with chocolate popping candy and crushed up honeycomb but it is just as delicious without.
For the chocolate filling
- To make the chocolate filling add the butter and sugar to a large saucepan and place over a medium heat. Simmer for 2 minutes before adding the salt and cream.
- Bring to the boil and simmer for 5 minutes, then remove from the heat and whisk in the chocolate until melted.
- Pour this mixture straight into the tart cases and leave in the fridge to set as per steps 12. & 13 in the above pastry section.
For the toasted marshmallow
- Put the sugar, golden syrup and water in a saucepan and heat over a medium heat until the temperature hits 117°C (use a sugar thermometer to measure this). It takes a good 5 – 7 mins to reach this temperature. Do not stir the mix during this process.
- While the sugar mix is reaching temperature you can prepare your egg whites. Separate your eggs (you can keep the yolks for custards and curds) and add the egg whites to a clean bowl and whisk at a slow speed only increasing to high once the sugar is nearly ready. You don’t want to reach the stiff peak stage too early.
- Once the sugar has reached the desired temperature pour it slowly over the egg whites, continuing to whisk at a high speed.
- Once the sugar syrup has been added, continue to whisk until the marshmallow has cooled to room temperature.
To plate
- I like to put a sweep of the marshmallow on one side of the plate and brown the top with a blow torch or under a hot grill. I then add the popping candy and smashed honeycomb to one half of the tart before adding to the plate. Tuck in and enjoy.